
CMake (2026-08-19 - 2026-08-20)#
Day 1: Basics#
Basic material, mandatory:
Final agenda point for day 1: have a look in Agenda: CMake (2026-08-19 - 2026-08-20), and discuss topics for day 2.
Day 2: Less Structured, More Practical#
The participants were well able to follow everything, and I was busy upholding my well-structured agenda against their demands 🥷. I really enjoyed day 2: much dynamicity, much live-hacking, less slide-presenting - all in all leading to severe trainer exhaustion.
Yesterday’s Exercise Solution#
Solve Exercise: Build BoilingPot/DataLogger C++ Project together. Discussed matters like what
target_include_directories()is, and especially what’s the meaning ofPUBLIC,PRIVATE, andINTERFACE.See https://codeberg.org/jfasch/cmake-subdirs-structure-dependencies for the solution. The solution also covers installation.
Installation (“Deployment”), shown live while doing the exercise.
Targets, Properties, And More, which is actually what the exercise is about.
The solution uses variables, though sparingly. Cover some of that: C++, Debug/Release, CMake “Programming”, Rants
Structure: public/, private/, src/#
Following the screenplay,
we restructured the project into something that had more
structure. Emphasis was put on when to use PRIVATE to reach one
node’s own header files vs. INTERFACE to export usage
requirements to using nodes.
For an immediate outcome it is probably best to look into the screenplay’s solution (https://codeberg.org/jfasch/cmake-public-private-src).
Find-Modules: SQLite3#
CMake comes with many “find modules”; show how to use FindSQLite3. Relevant places to look:
Toplevel
CMakeLists.txtfor the configure/check step (CMakeLists.txt)Depending the
data-loggerlibrary on SQLite3: data-logger/CMakeLists.txt)Source code, naturally: sink-sqlite3.h, sink-sqlite3.cpp
Hand-Writing A Find-Module#
Step 1: for the purpose of integrating our own project into another project, I created a simple brute-force find-module that is installed together with the project’s artifacts for use by others. It requires a little CMake programming knowledge, though, which I presented as necessary. See The Language for more.
Relevant places:
The find-module: cmake/FindGluehwein.cmake
Installation of it in the toplevel CMakeLists.txt
Build and install:
$ cmake -DCMAKE_INSTALL_PREFIX=/home/jfasch/My-Installs/deployment ~/My-Projects/2026-08-19-gluehwein
$ make
$ make install
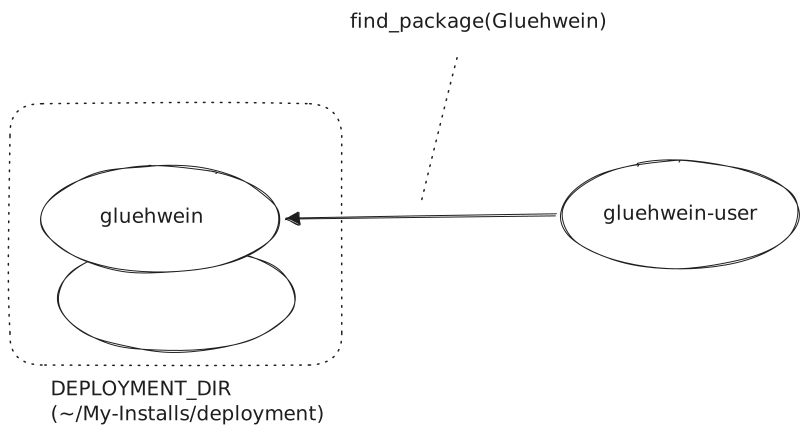
Step 2: use our project from another project. We quickly created such a project (here); it only contains one trivial program that uses our project via the find-module from step1.
cmake_minimum_required(VERSION 3.16)
project(DecadentlyCookingWine)

find_package(Gluehwein REQUIRED)     # <-- HERE

add_executable(cook-it cook-it.cpp)
target_link_libraries(
  cook-it
  Gluehwein::Gluehwein               # <-- AND HERE
)
Build and use cookery from what’s installed/deployed in
/home/jfasch/My-Installs/deployment. We are using aFindGluehwein.cmakefrom a non-standard location, so we passCMAKE_MODULE_PATH. The find-module is passed that location too which we also have to pass, separately, unfortunately.$ cmake \ -DCMAKE_MODULE_PATH=/home/jfasch/My-Installs/deployment/share/Modules \ -DDEPLOYMENT_DIR=/home/jfasch/My-Installs/deployment \ \ ~/My-Projects/2026-08-19-gluehwein-user $ make
Note
Conan is a package manager for C/C++, and probably better suited for such tasks.
CMake Function gluehwein_add_library()#
To defend against code explosion, one usually writes functions to eliminate duplicate code. This is what we did near the end of day 2.
Relevant places:
The function itself, in cmake/functions.cmake
Toplevel CMakeLists.txt, including that file - thus inheriting the function’s definition into subdirectories.
Usage in